Waking Up to Whimsy: Simple Steps to Decorate Festive Bunny Cinnamon Rolls for Spring
As the days grow longer and the world bursts into vibrant color, there's a special joy in bringing that springtime magic into our homes. What better way to celebrate the season of renewal than with an adorable, delicious treat that's as fun to make as it is to eat? Enter bunny cinnamon rolls – the ultimate festive breakfast idea that combines the comforting warmth of a classic cinnamon roll with an irresistible dose of cuteness. Perfect for Easter morning, a celebratory spring brunch, or simply adding a touch of enchantment to a regular weekend, these charming confections are surprisingly simple to create, even for the busiest of mornings.
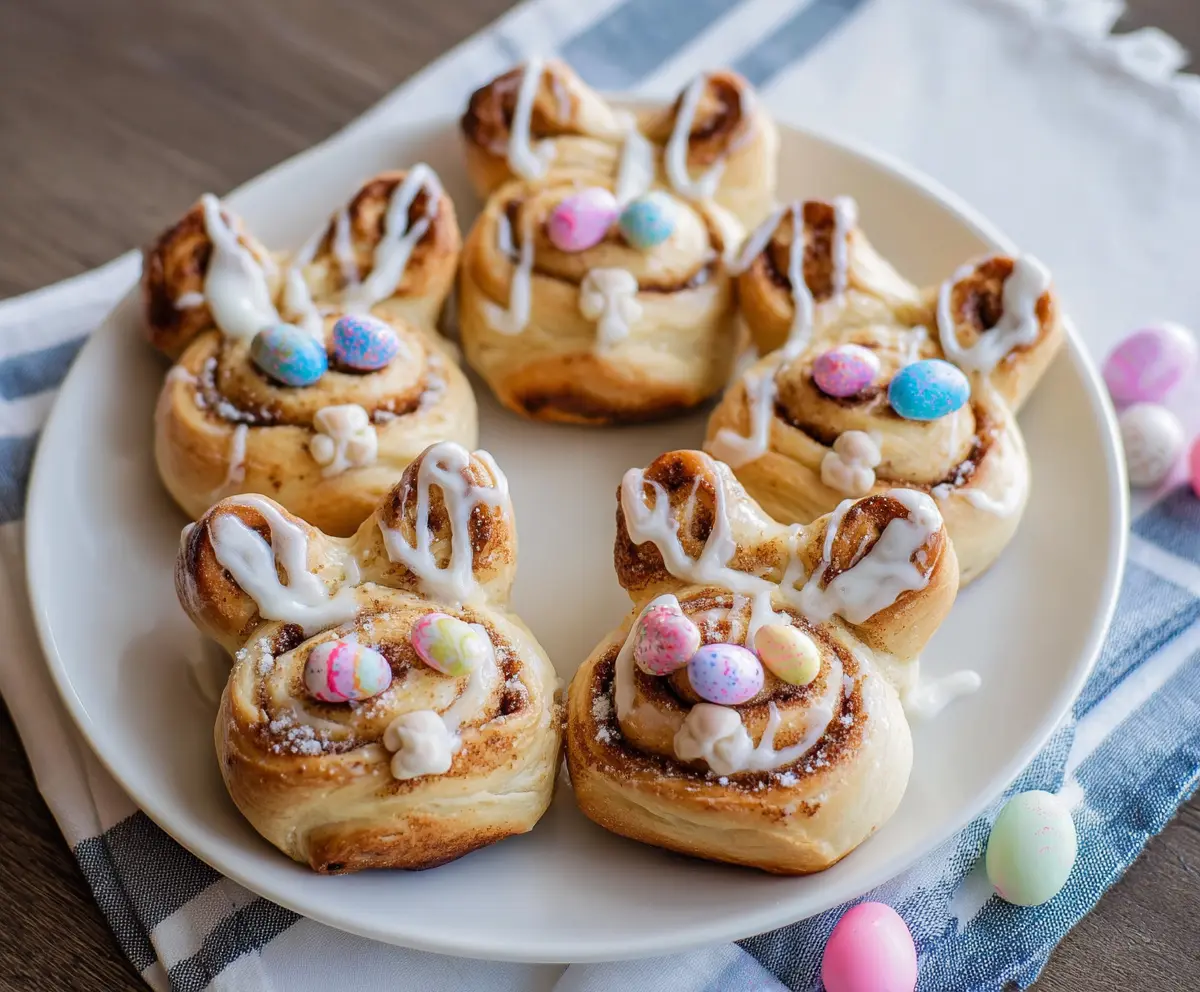
Forget complex baking projects. Our guide focuses on transforming readily available canned cinnamon rolls into delightful bunny faces, making this a stress-free and family-friendly activity. We'll walk you through not only shaping these sweet creatures but, more importantly, how to decorate them with flair, turning each roll into a miniature work of edible art. Get ready to hop into spring with a treat that promises smiles, laughter, and a dash of irresistible sweetness!
Why Bunny Cinnamon Rolls are the Perfect Spring Treat
The appeal of bunny cinnamon rolls goes far beyond their undeniable charm. They represent the ideal marriage of convenience and creativity, making them a standout choice for spring festivities:
- Effortless Elegance: Starting with store-bought refrigerated cinnamon roll dough means you bypass the lengthy proofing and kneading associated with traditional baking. This shortcuts the process significantly, allowing you to achieve impressive results with minimal fuss. It's the secret weapon for a stunning breakfast without waking up at dawn!
- Kid-Friendly Fun: This isn't just a recipe; it's an activity! Kids of all ages will delight in helping to unroll, shape, and especially decorate their bunny creations. It’s a wonderful way to engage little hands and foster creativity in the kitchen, making breakfast a memorable part of the holiday or weekend.
- Versatility for Any Occasion: While they are a quintessential Easter breakfast, these festive rolls are equally suited for a springtime playdate, a Mother's Day brunch, or even a simple "just because" treat to brighten a mundane Tuesday. Their cheerful appearance instantly elevates any gathering.
- A Canvas for Creativity: Beyond their basic shape, bunny cinnamon rolls offer endless possibilities for decoration. From simple chocolate chip eyes to elaborate pastel frostings and whimsical sprinkles, each roll can be personalized, allowing your culinary imagination to run wild.
Much like other holiday-themed treats such as shamrock or heart-shaped cinnamon rolls, the secret to these spring bunnies lies in a few clever adjustments to store-bought dough. For a deeper dive into the basic shaping, you might find inspiration in our article on Easy Bunny Cinnamon Rolls: Quick Easter Treat from Canned Dough.
Gathering Your Simple Supplies for Adorable Bunny Cinnamon Rolls
One of the best aspects of this recipe is its minimal ingredient list. You likely have most of what you need already!
What You’ll Need:
- 1 can of refrigerated cinnamon rolls (with included icing): Any major brand will do. Pillsbury is a popular choice and works wonderfully for shaping. Ensure it’s the standard-sized can, not the jumbo, for easier shaping.
- Chocolate chips or mini chocolate chips: These are perfect for creating expressive eyes and cute noses. Having both sizes on hand offers more creative options.
- Optional: Candy eyeballs: While they can add a quirky charm, some find them a bit "creepy." If you're a fan of whimsical, go for it! Your kids will likely adore them.
Optional Decoration Enhancements:
To truly make your bunny cinnamon rolls shine, consider these additional decorative elements:
- Food coloring (gel preferred): To tint your icing into soft pastel hues like pink, lavender, mint green, or sky blue, perfectly fitting the spring theme.
- Spring-themed sprinkles: Think pastel nonpareils, jimmie sprinkles, or even tiny edible flowers.
- Mini candies: Small M&Ms, jelly beans, or even fruit-flavored candies can make delightful noses or accents.
- Thin pretzel sticks: For edible whiskers.
- Shredded coconut: A small dollop of icing topped with coconut can create a fluffy bunny tail illusion.
- Edible glitter: For an extra sparkly touch.
- Icing writing pens: For precise details like inner ear lines or delicate whiskers.
Step-by-Step Guide to Crafting Your Bunny Cinnamon Rolls
Let's get those cute bunnies shaped and baked!
- Preheat Your Oven: Follow the temperature instructions precisely on your cinnamon roll package. This is typically around 350°F (175°C). Line a baking sheet with parchment paper for easy cleanup and to prevent sticking.
- Unroll with Care: Gently unroll each cinnamon roll about one-third of the way. The goal is to leave the main spiral circle intact, as this will form the bunny's face. The unrolled portion will become the ears. Be careful not to tear the dough.
- Shape the Ears: Take the unrolled strip of dough and cut it lengthwise down the middle, creating two thinner strips. Now, carefully bend each strip into a loop, bringing the ends back down to meet the main circular face. Gently press the ends onto the dough to help them adhere and hold their shape during baking. Aim for symmetrical ears for the best aesthetic. If they feel like they might separate, a tiny dab of water can sometimes help them stick.
- Bake to Golden Perfection: Place your shaped bunnies on the prepared baking sheet and bake according to your package directions. This usually takes about 13-17 minutes. Keep an eye on them; you want them to be golden brown and puffed up, but not overly dark.
- Cool Slightly Before Frosting: Once out of the oven, let your bunny cinnamon rolls cool on the baking sheet for a few minutes. They should still be warm, but not piping hot. This prevents the icing from melting completely and allows it to spread smoothly and set nicely. If any ears separated slightly during baking, gently squish them back into place while they're still warm and pliable – the frosting will hide any minor imperfections!
Elevating Your Bunny Cinnamon Rolls with Creative Decoration Ideas
This is where the real fun begins and your simple baked goods transform into festive masterpieces! The decorating stage is your opportunity to infuse personality into each bunny. For more ideas on getting kids involved, check out Hop into Easter with Adorable Bunny Cinnamon Rolls Kids Will Love.
The Frosting Foundation:
The included icing is your base. For an extra festive touch, consider tinting it:
- Pastel Perfection: Divide the icing into small bowls. Add a tiny drop of gel food coloring (gel colors provide vibrant hues without thinning the icing too much) to each bowl – think pale pink, soft yellow, light blue, or lavender. Mix thoroughly until you achieve your desired pastel shade.
- Even Application: Use a small offset spatula or the back of a spoon to spread a generous layer of tinted (or plain) icing evenly over the face and ears of each warm bunny roll. The warmth will help it spread beautifully.
Crafting the Bunny's Face:
Now for the details that bring your bunnies to life:
- Expressive Eyes:
- Chocolate Chips: Place two standard chocolate chips, pointed side down, for classic bunny eyes. Mini chocolate chips work well for a slightly daintier look. Experiment with placement – closer together for a sweet, innocent look, or a bit wider apart for a more cartoonish appeal.
- Candy Eyeballs: If you're using candy eyeballs, simply press two onto the frosting. Embrace their sometimes-goofy charm!
- Icing Dots: For a completely edible and often cuter option, use a small piping bag (or a Ziploc bag with a tiny corner snipped off) to pipe two white dots of icing for the eyes. Once set, add a smaller black or blue dot in the center for the pupil.
- Alternatives: Small blueberries, raisins, or even licorice bits can also be used for eyes.
- The Perfect Nose:
- Mini Chocolate Chip: A single mini chocolate chip placed just below the eyes creates a classic bunny nose.
- Pink Perfection: A pink heart sprinkle, a small piece of red licorice, or even a tiny segment of a strawberry or raspberry can create an adorable pink nose. You can also pipe a small pink icing dot.
- Sweet Candies: A small pastel M&M or a jelly bean can also serve as a colorful nose.
- Whimsical Whiskers:
- Piped Icing: Using a piping bag with a fine tip (or the snipped Ziploc bag), pipe three thin lines on either side of the nose for delicate whiskers. White, black, or even chocolate icing works well.
- Pretzel Sticks: Thin pretzel sticks broken into smaller pieces can be gently pressed into the frosting for a rustic, edible whisker effect.
- Inner Ear Details:
- After frosting the entire bunny, use a contrasting color of tinted icing (e.g., pink icing on a blue bunny) to pipe a smaller oval or line inside the ear loops. This adds depth and character.
- Alternatively, sprinkle some pastel jimmie sprinkles or fine edible glitter inside the ear shape for a sparkly effect.
- Rosy Cheeks and Fluffy Tails:
- For rosy cheeks, mix a tiny bit of red food coloring with a pinch of powdered sugar and lightly brush it onto the "cheeks" area with a small, clean brush.
- To create a fluffy tail, add a small dollop of extra icing to the bottom of the "face" part of the roll, then immediately press some shredded coconut onto it.
- Final Flourishes: Sprinkle pastel nonpareils or small candy flower sprinkles around the bunny's face or ears for an extra festive touch.
- Work While Warm: Remember, the key to smooth frosting and easy decoration application is to work when the rolls are warm, but not fresh out of the oven.
- Get Kids Involved: Assign specific tasks to different age groups. Younger children can choose chocolate chips for eyes, while older ones might help with tinting icing or piping whiskers.
- Troubleshooting Ears: If your bunny ears seem to sag or separate during baking, don't fret! As soon as they come out of the oven, gently press them back into shape with a spatula or your fingers (careful, they're hot!). The frosting will mask any minor imperfections.
- Storage: These delightful bunny cinnamon rolls are best enjoyed the day they're made for peak freshness. However, leftovers can be stored in an airtight container at room temperature for up to two days, or refrigerated for up to four days. Reheat gently in the microwave for a few seconds to restore their warmth and softness.
- Make-Ahead Option: You can shape the bunny rolls the night before, cover them tightly with plastic wrap, and refrigerate. In the morning, simply bake as directed, then frost and decorate. This is a great time-saver for busy holiday mornings.
Tips for Perfecting Your Bunny Cinnamon Rolls and Making Them Extra Special
A Sweet Springtime Tradition Awaits
Transforming a humble can of cinnamon rolls into a parade of adorable, festive bunnies is a simple joy that embodies the spirit of spring. With just a few creative touches and a dash of enthusiasm, you can craft a memorable breakfast or brunch centerpiece that delights both young and old. These bunny cinnamon rolls are more than just a treat; they're an invitation to slow down, create, and share sweet moments with loved ones. So gather your ingredients, unleash your inner artist, and get ready to bake up some serious springtime cheer. Happy decorating!
